ZoneAlarm
Jump to navigation
Jump to search
The printable version is no longer supported and may have rendering errors. Please update your browser bookmarks and please use the default browser print function instead.
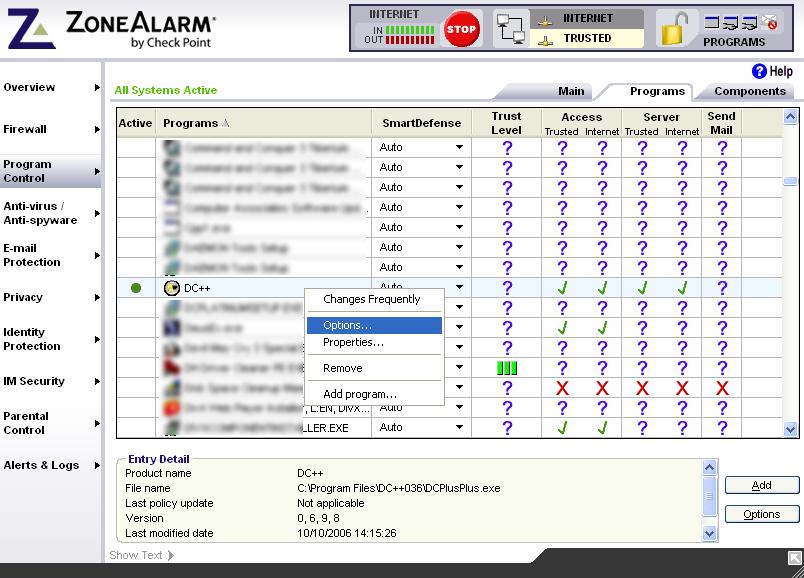
- Open up ZoneAlarm, click on "Program Control" and then the "Programs". Find DC++ on the list, right click it and select "Options".
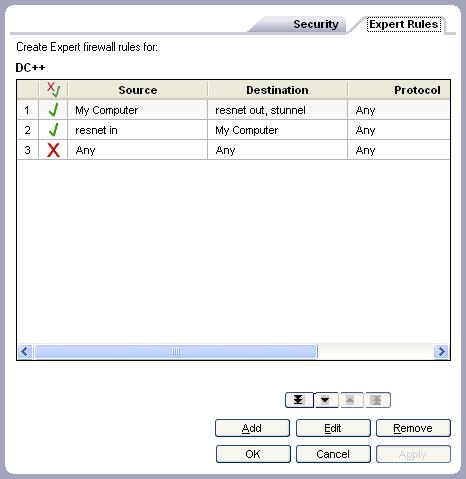
Then click on “Expert Rules” and you should see the following window (minus the actual rules).

- You now need to create three rules (to create each new rule click on "add").
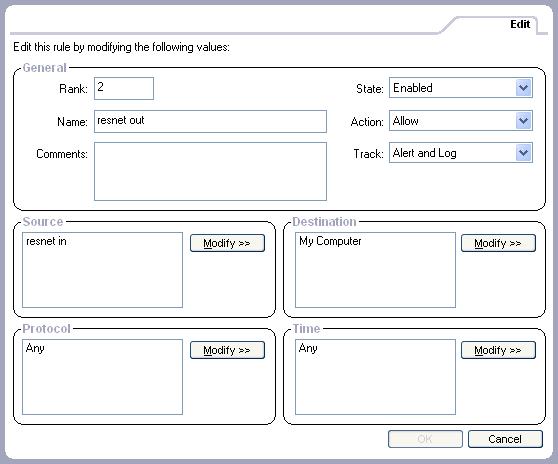
First, allow DC++ to access ResNet and stunnel: • Clicking on "Add" opens the "Edit Rule" window below.
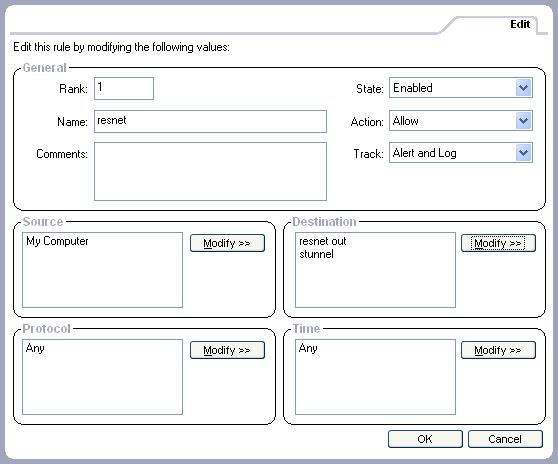
• First enter a name in the "Name" box (anything will do, but it could be useful to name it properly). Make sure that "Action" is set to "Allow".
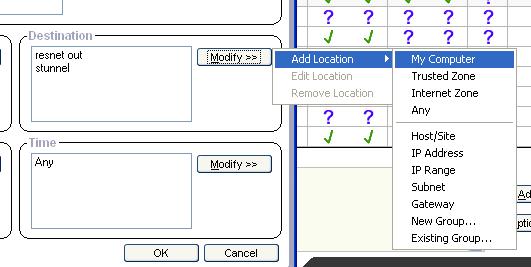
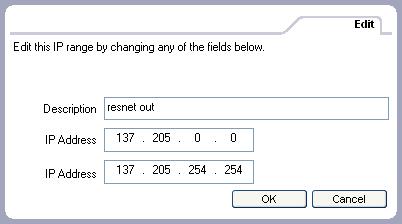
• Click on "Modify" in the "Source” section, select "Add Location" and then "My Computer". • Click on "Modify" in the "Destination" section, select "Add Location" and then "IP Range" and you should see the following window. Just enter the data as you see it and click "OK" to return to the "Edit Rule" window.
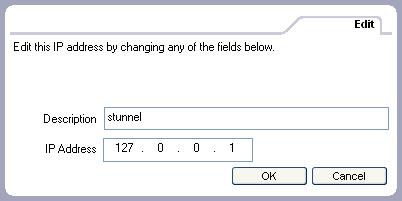
• Again click on “Modify” in the "Destination" section, select "Add Location" but this time select "IP Address” and you should see the following window. Enter the data as you see it and click "OK" to return to the "Edit Rule"” window.
• Check that "Source", "Destination" and "Action" are set correctly and click "OK". You should now find you have a new rule in the Expert Rules for DC++ with a green tick next to it. - Create a rule to allow ResNet to access DC++:
This part is exactly the same as setting DC++ to access ResNet above except that the Source and Destinations are switched round (but no need for stunnel this time).
• Click "Add" to open a new "Edit Rule" window (as above). • Click "Modify" in the "Destination" section and set it to "My Computer". • Click "Modify" in the "Source" section select "Add Location" -> "IP Range" and fill in the same IP range for ResNet as before. Fill in the "Description" box with a name.

• Click OK to get back to the edit rule window check that "Source", "Destination" and "Action" (see Below) are set correctly and click "OK" again. You should now find you have two green ticked rules in the Expert Rules for DC++ window. - Finally, create a rule to block all other traffic for DC++:
The Final Rule is very simple:
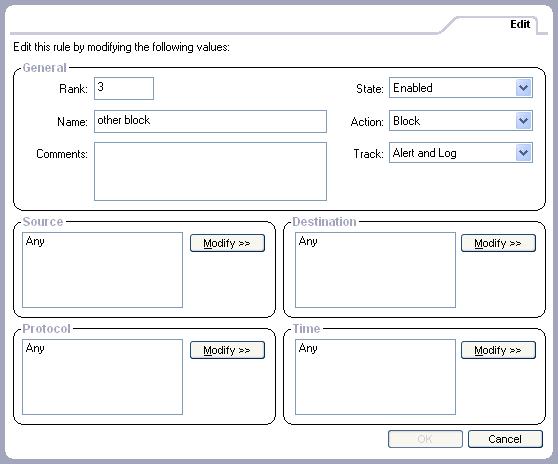
• Click on "Add" to open up a new "Edit Rule" window • Enter "block other" in the "name" box. • Set the "Action” to "Block". • Click "OK"
You should now find you have three rules, two with ticks and one with a red cross, as below. Check that Sources and Destinations all match up, then click "OK" and you’re done.