Windows 7
Windows 7 Firewall: How To Block Off Campus – Campus Connections
Windows 7 Firewall has the capability to block both inbound and outbound connections. The Scripts we used for Vista still work brilliantly in Win7. The Win7 firewall interface also lets us configure the firewall graphically, something Vista did not allow.
The firewall scripts are the easiest way to set up these rules, however if you wish to see exactly what is happening graphically this guide may help you.
Before you begin, please close DC++ to avoid any conflict with active applications.
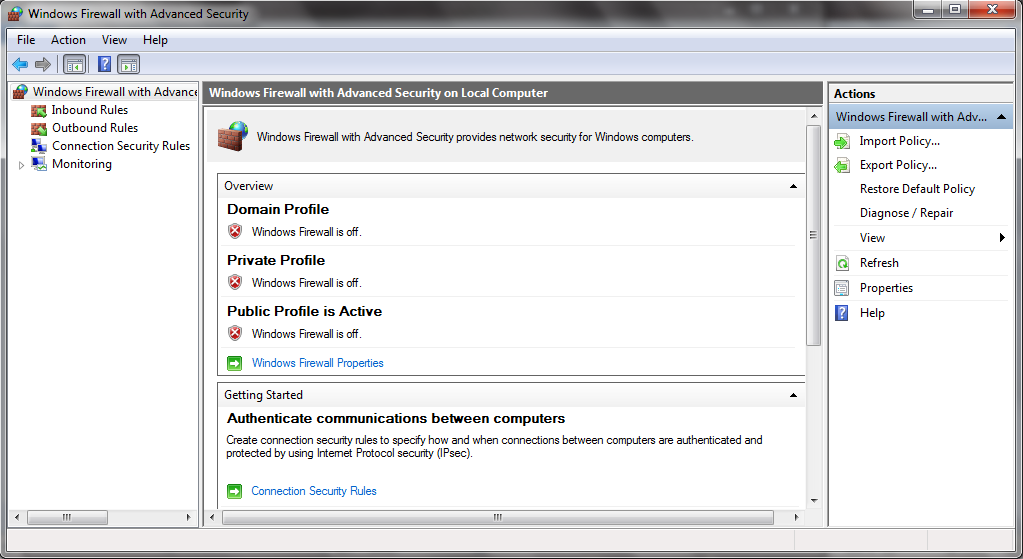
Step 1: From the Control Panel, open the Windows Firewall settings and navigate to Advanced Settings. You should see the below page.
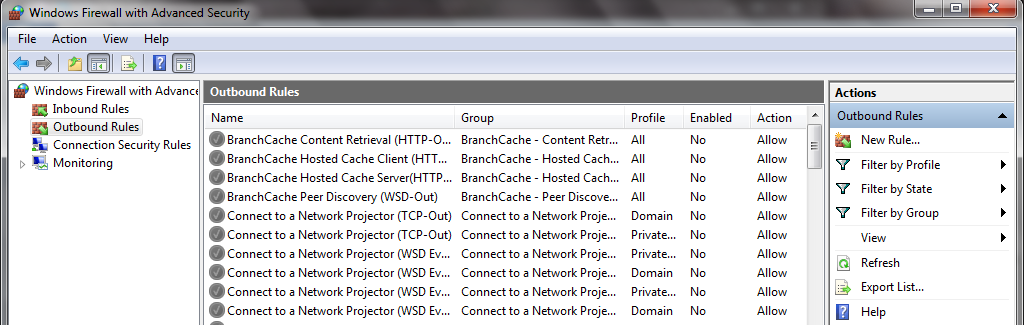
Step 2:
Navigate to the Outbound Rules, and select Add New Rule.
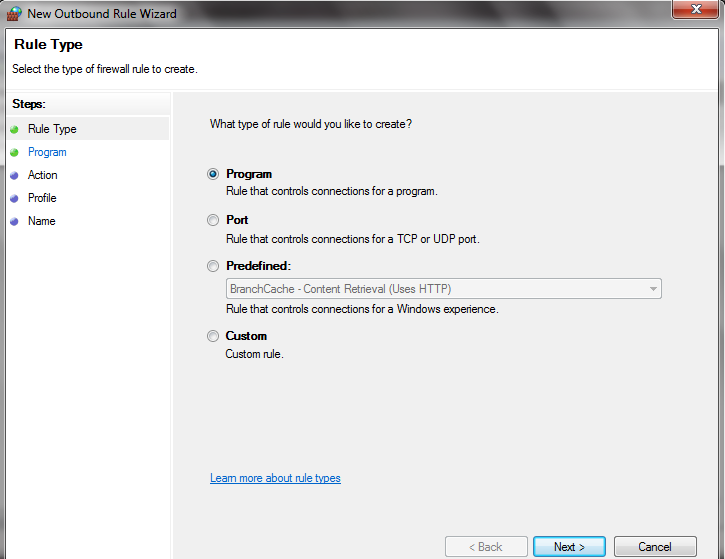
Step 3:
Select Program as the Rule Type.
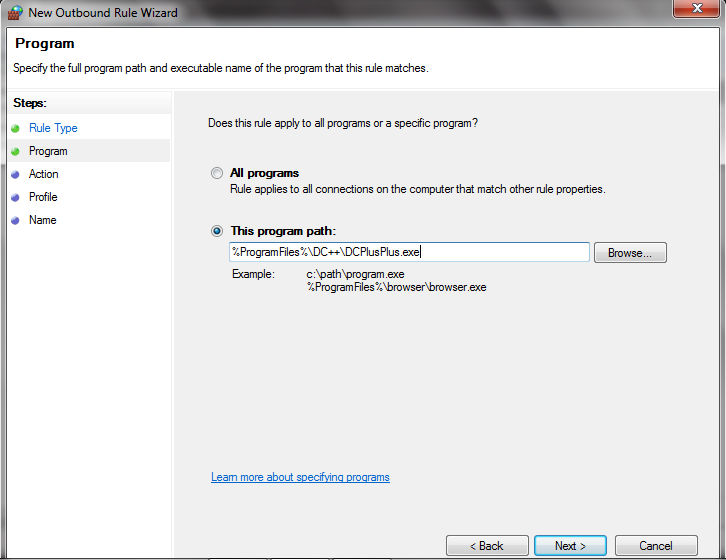
Step 4:
Select the program path radio button and use the browse button to locate the DC++ executable file (usually C:\Program Files\DC++\DCPlusPlus.exe).
Step 5:
Now we need to create rules to allow Campus (ResNet) connections, and rules to block Off Campus connections. We will start with rules to allow campus connections. So for Action, select Allow the connection.
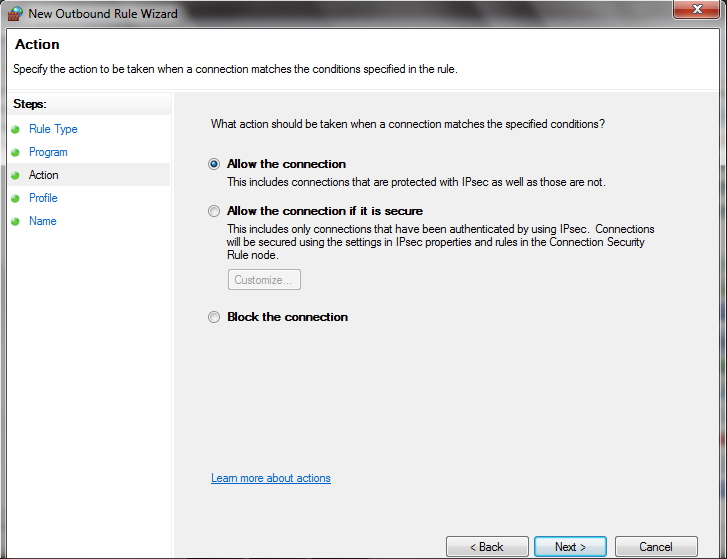
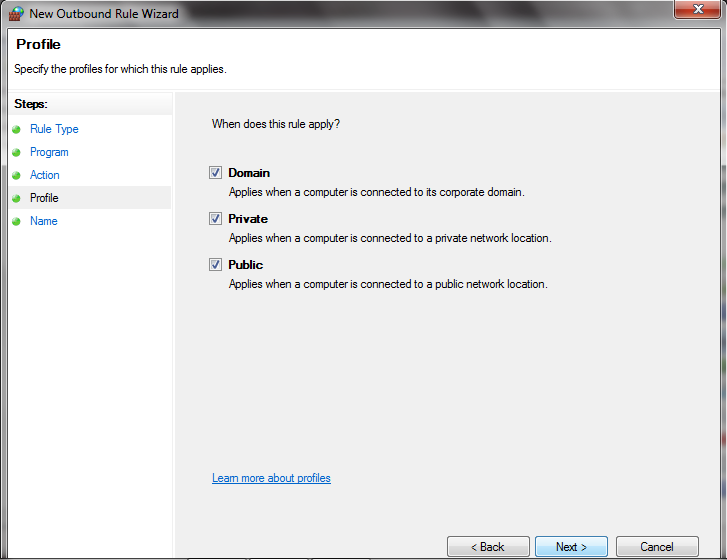
Step 6
I have selected all 3 profiles. There is probably another way of using the profiles to enhance these rules, however I have not tried them however.
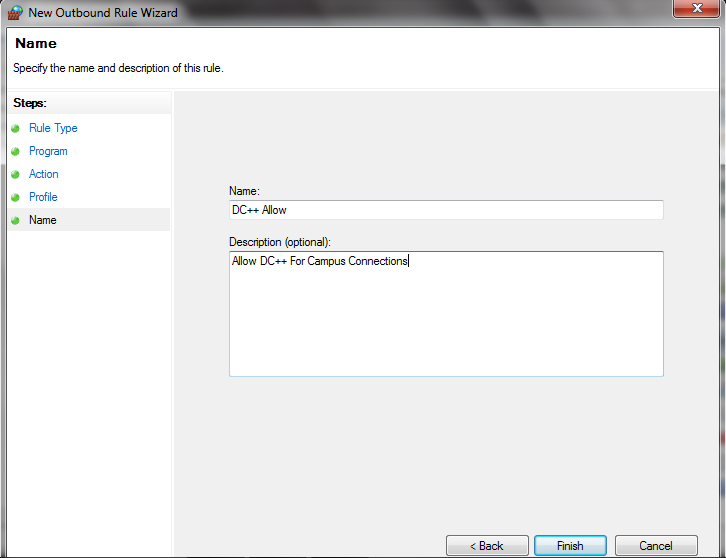
Step 7:
Name the rule, I have used DC++ Allow here, the scripts use DC++1, DC++2 etc. You may use whatever is convenient for you. If you want you can also put a description for what the rule is doing.
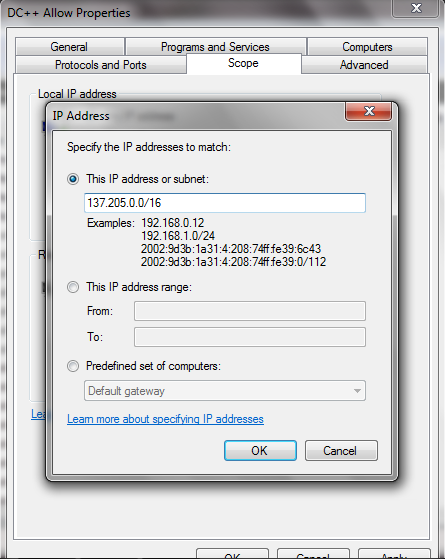
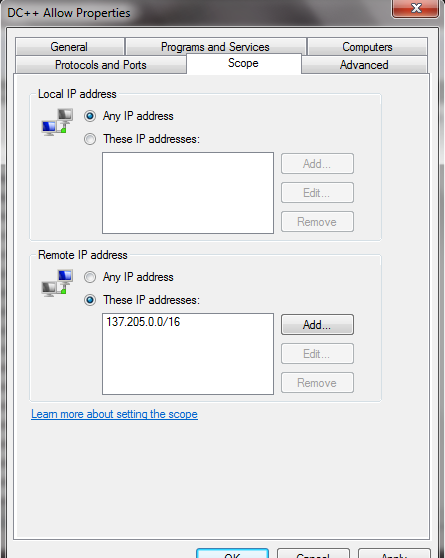
Step 8:
Now right click on the rule you created, and select Properties. Navigate to the Scope tab, and under Remote IP address click add. Now enter the IP address as 137.205.0.0/16. You may also select from 137.205.0.0-137.205.255.255. We now have the rule to allow ResNet connections configured!
|
|
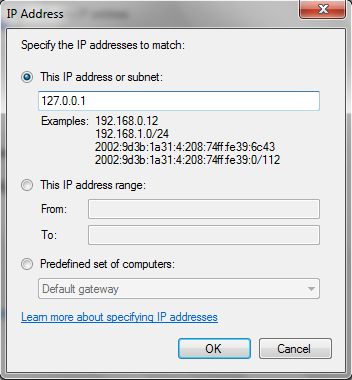
Step 9:
We will now make a rule to allow DC++ to connect to stunnel. Please repeat Steps 2-7 naming the rule appropriately. Navigate to the Properties of the new rule, go to the Scope tab and enter the IP address as 127.0.0.1.
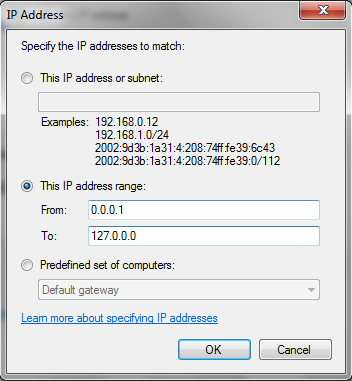
Step 10:
We will now make a rule to block Off Campus connections. Please repeat Steps 2-4 naming the rule appropriately. In Step 5, we selected Allow the connection, however in this case please select Block the connection. Continue with Steps 6-7, to create the rule. Navigate to the Properties of the new rule, go to the Scope tab and enter the IP address range 0.0.0.1-127.0.0.0.
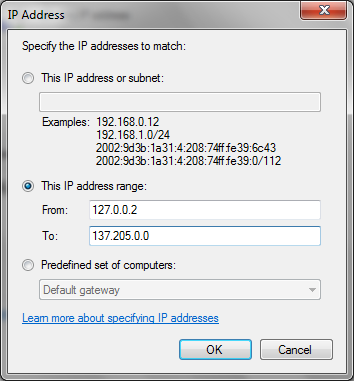
Step 11:
We will now make another rule to block Off Campus connections. Please repeat Steps 2-4 naming the rule appropriately. In Step 5, we selected Allow the connection, however in this case please select Block the connection. Continue with Steps 6-7, to create the rule. Navigate to the Properties of the new rule, go to the Scope tab and enter the IP address range 127.0.0.2-137.205.0.0.
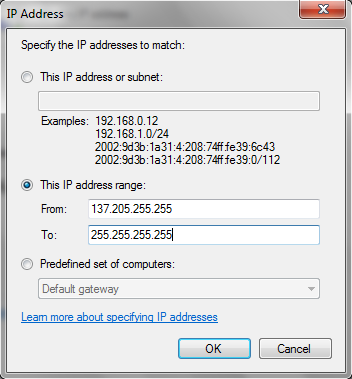
Step 12:
We will now make a rule to block Off Campus connections. Please repeat Steps 2-4 naming the rule appropriately. In Step 5, we selected Allow the connection, however in this case please select Block the connection. Continue with Steps 6-7, to create the rule. Navigate to the Properties of the new rule, go to the Scope tab and enter the IP address range 137.205.255.255-255.255.255.255.
Step 13:
With these steps all the outgoing rules are complete. Please repeat Steps 2-12, for Inbound Rules naming the rules appropriately.
Congratulations! You are all done now. Please contact an operator on the hub to test your configuration.